Sonos Beam Ultra


Overview
Overview
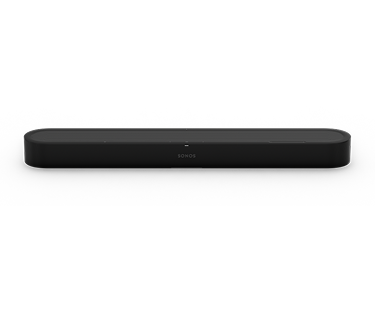
Featuring true 7.1.2 Dolby Atmos in a compact soundbar. Clear dialogue. Deeper bass. Sound that fills the room and grows into a full Sonos system.¹
- Surround sound in one soundbar. 7.1.2 Dolby Atmos makes every scene feels bigger, more realistic, and more immersive.¹
- Every word, perfectly clear. Dialogue comes through clearly from the moment the TV turns on. Speech Enhancement makes it even clearer.
- Designed for the room you live in. Slim enough to sit under your TV. Place it on your furniture or mount it to the wall.¹
- More drivers, more detail. Nine drivers – four more than Beam – reveal more depth in every note and create a wider soundstage.¹
- Made for music too. Tuned by GRAMMY and Oscar-winning creators, Beam Ultra sounds as good for music as movies.¹
¹ Dolby Atmos experience requires Dolby Atmos-encoded content and a compatible HDMI eARC connection. Dolby, Dolby Atmos, and the double-D symbol are registered trademarks of Dolby Laboratories Licensing Corporation. Manufactured under license from Dolby Laboratories.
Controls and lights
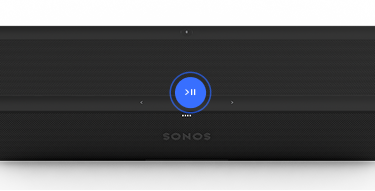 | Play/Pause | PlaybackTap to play or pause audio. GroupWhen another Sonos speaker is streaming audio, press and hold Play/Pause (about 1 second). You’ll hear a tone and your speakers will begin playing the same content. Sound SwapWhen another Sonos speaker is streaming audio, press and hold Play/Pause (about 2 seconds). You’ll hear a tone and content will stop streaming from the other Sonos speaker and start streaming on your Beam Ultra. |
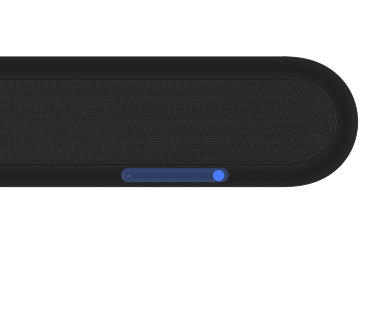 | Volume |
Note: When music is playing, press and hold + or - to quickly change the volume. |
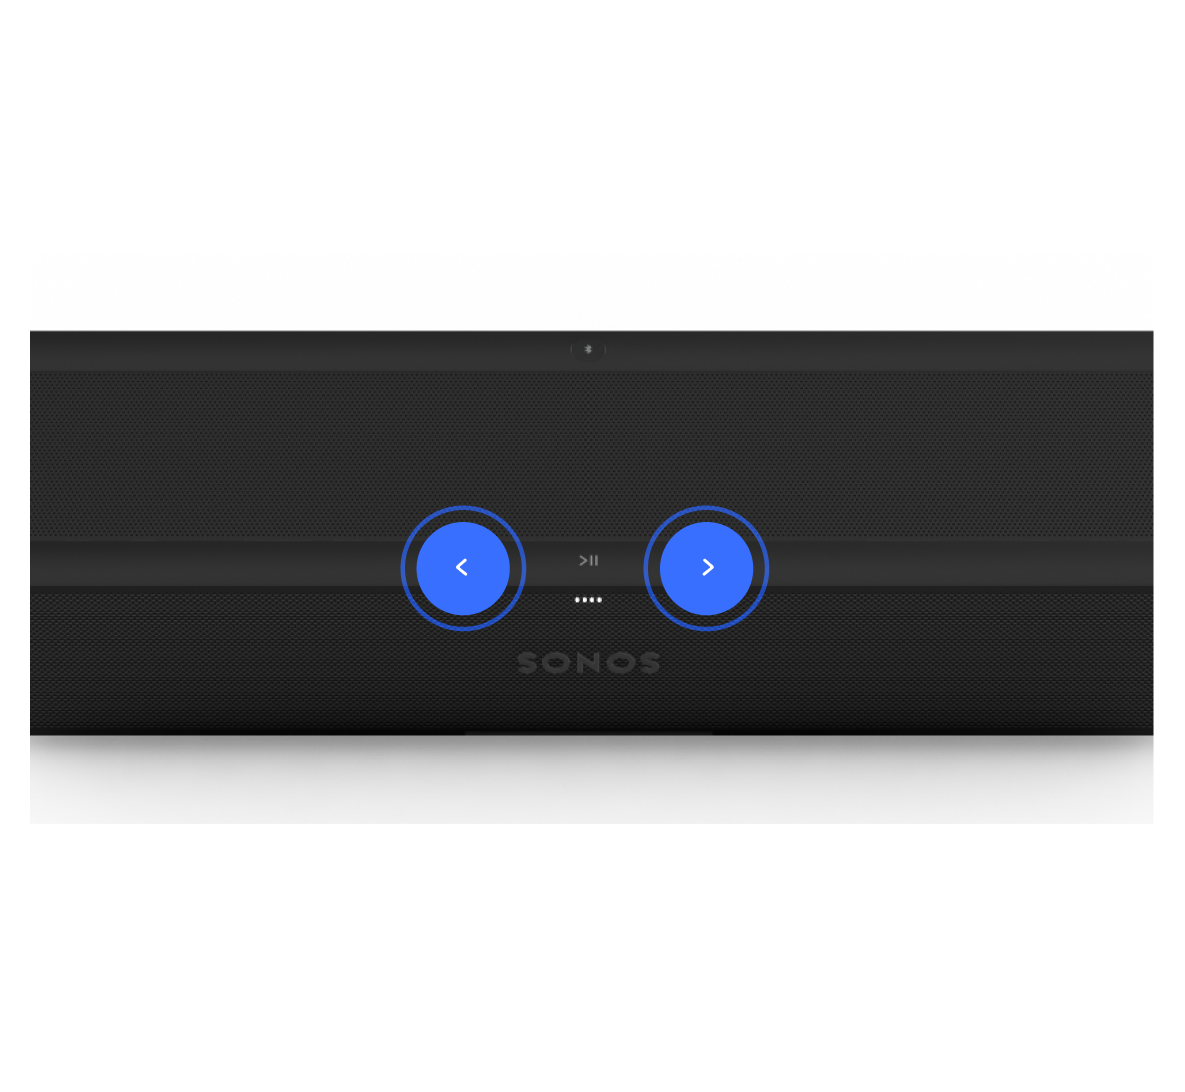 | Next/Previous (music only) |
Note: You can’t skip forward or go back when listening to a radio station. |
 | Voice control | Press the voice services icon to turn voice services on or off.
Note: the microphone switch located on the connector panel (back) must be turned on to use voice services. |
 | Status light |
|
Connector panel
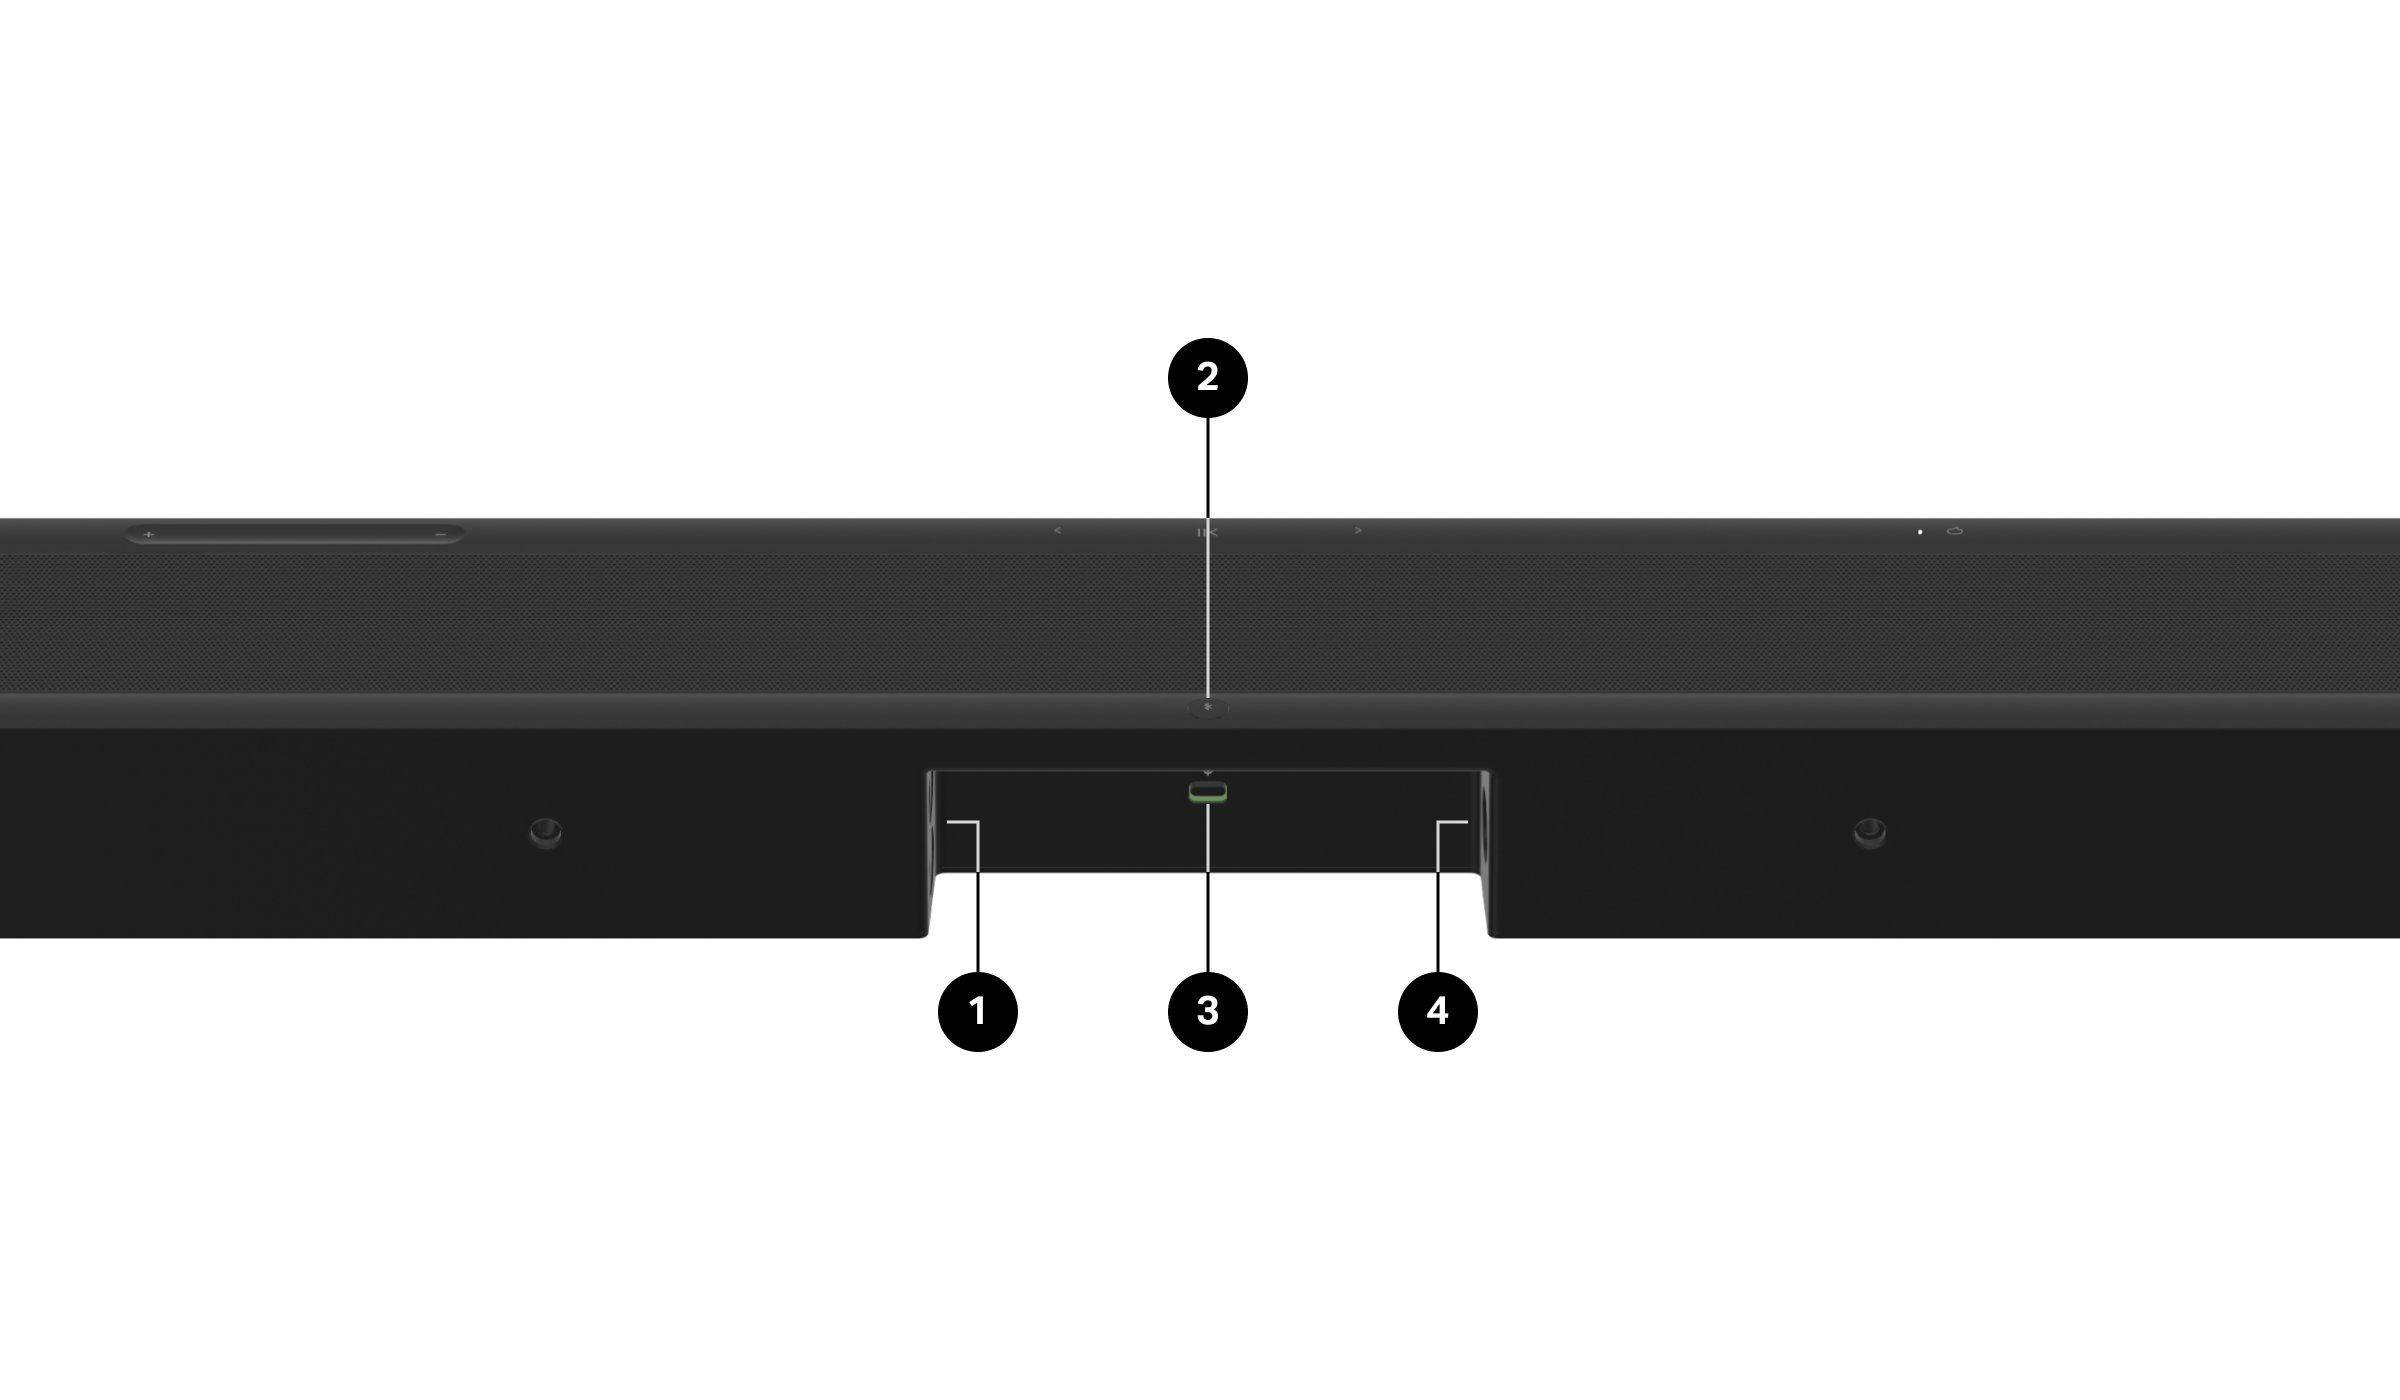
1 | HDMI port | ARC or eARCConnect your soundbar to your TV's HDMI eARC or ARC port with an HDMI cable (included). OpticalConnect your soundbar to your TV's optical port with a Sonos Optical Audio Adapter (sold separately) and an HDMI cable (included). |
2 | Bluetooth button | Pair a new device:
When your Beam Ultra successfully connects to Bluetooth, the status light will show solid blue. |
4 | Universal microphone switch | Toggle to turn all product microphones on or off.
Note: To use voice services, both the microphone switch and the voice services indicator light must be on. |
5 | AC power (mains) input | Use only the included power cable (using a third-party power cord will void your warranty). Note: Insert the power cord firmly until it is flush with the speaker. |
Placement
Here are some recommendations to get the most out of your Beam Ultra soundbar:
- Place Beam Ultra on a stable, horizontal surface. Don't place it vertically or on its side.
- Don’t enclose Beam Ultra in a cabinet or in a corner.
- Make sure the controls are facing up.
- For best sound quality, place Beam Ultra in front of and below your TV. Alternatively, you can mount it above your TV.
- If placing Beam Ultra below your TV, keep 4 in (10 cm) of space (minimum) between the top of the soundbar and the bottom of your TV.
Connect the cables
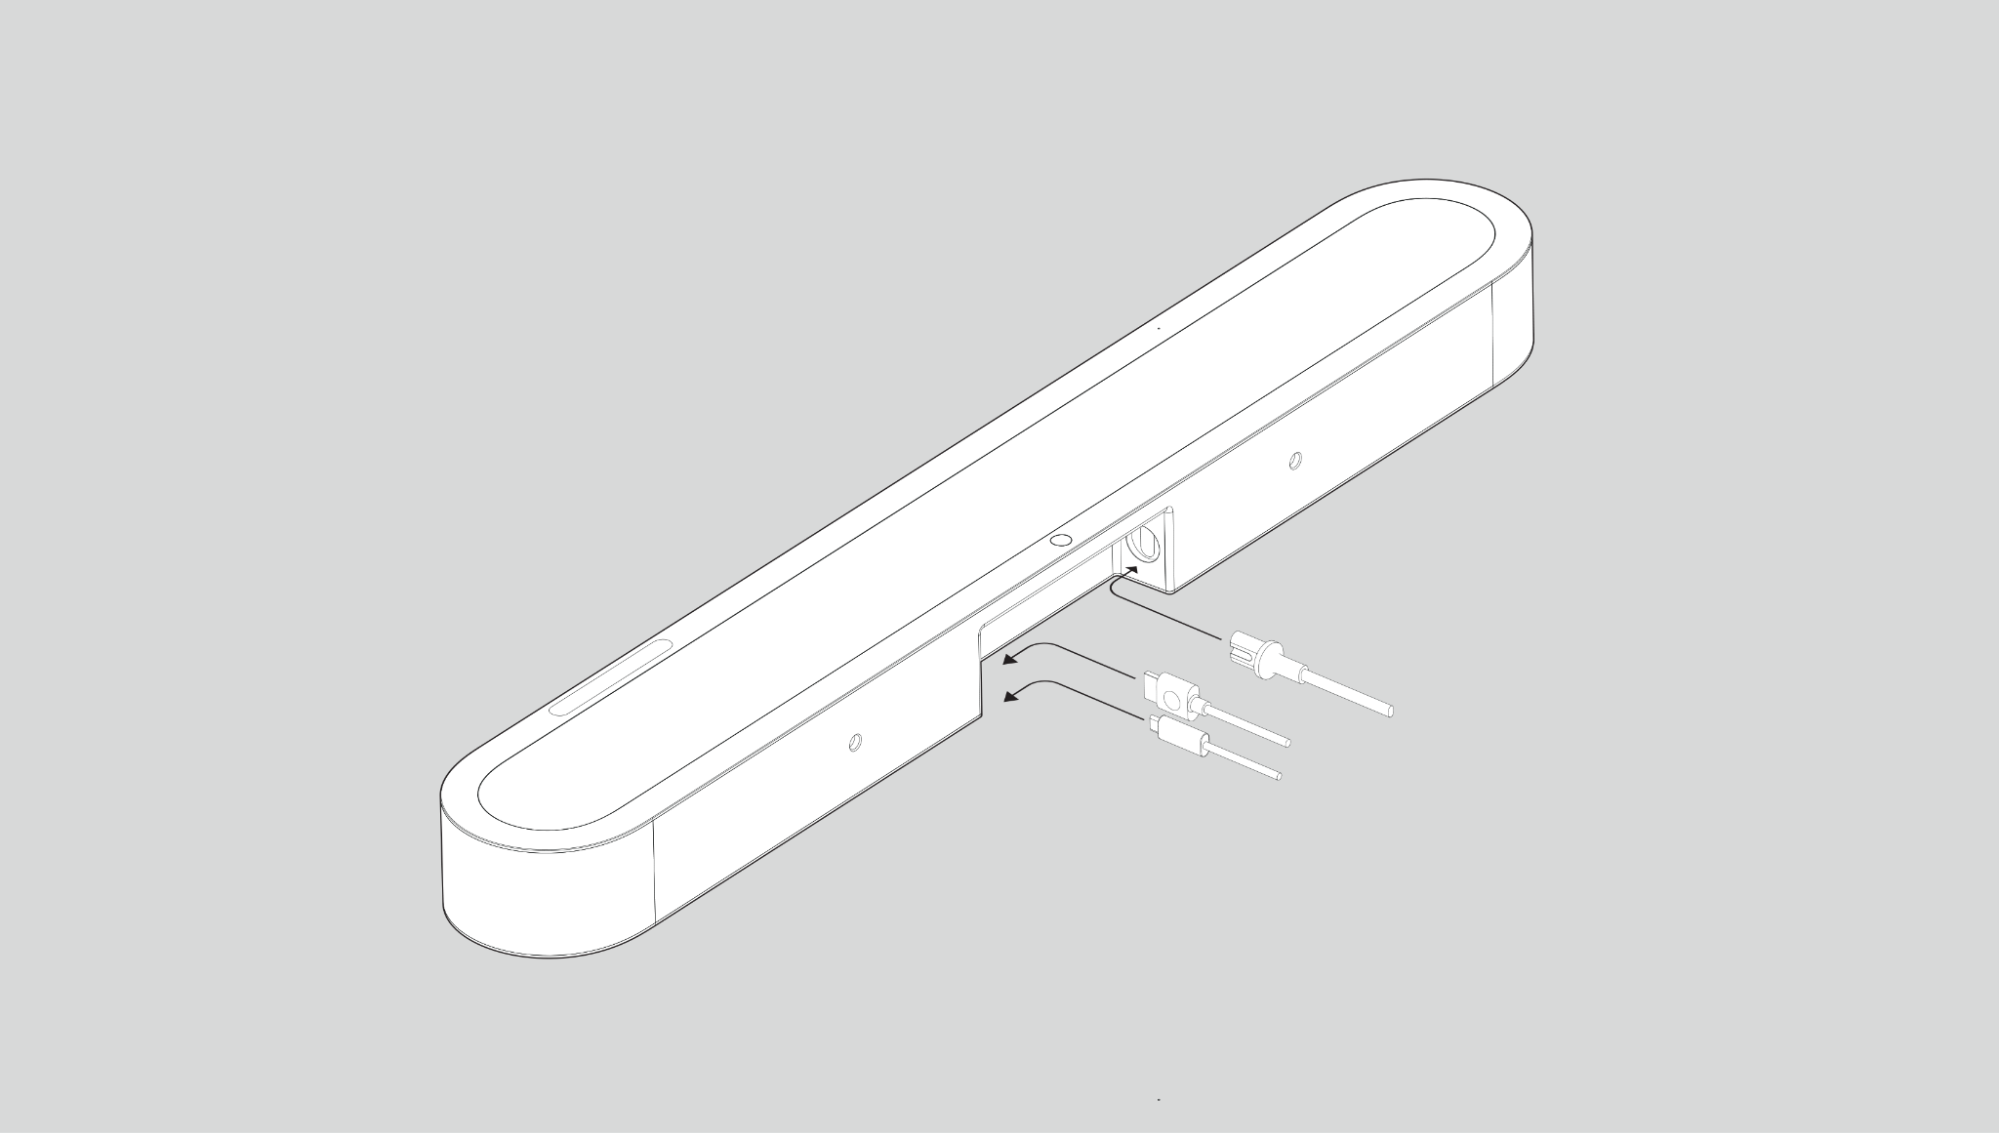
When your soundbar is securely where you want it, use the included cables to set up your Beam Ultra.
Before you start:
- Disconnect existing home theater or surround sound equipment from your TV.
- Connect any external devices, like a streaming box or DVD player, directly to your TV.
- Turn your TV on.
1 | Connect the power cable to Beam Ultra and plug it in to power. Note: Use only the included power cable (using a third-party power cord will void your warranty). | |
2 |
| |
3 | Connect the other end of the HDMI cable to your TV:
1. Remove the protective cap from the optical adapter, then attach the optical adapter to the HDMI cable. 2. Connect the optical adapter to your TV’s optical digital OUT port. Note: Make sure the optical adapter aligns correctly into the port before securely plugging it in. Inserting the adapter incorrectly may damage the adapter. |
Wall mount
Use the Beam Ultra Wall Mount (sold separately) to mount Beam Ultra to the wall below (recommended) or above your TV.
Beam Ultra is not compatible with wall mounts for other Sonos soundbars, including Beam Gen 2, Arc, and Arc Ultra. Using an incompatible mount poses a safety risk.
Sonos recommends:
- For optimal acoustic performance:
- Keep both sides of the soundbar at least 1 in (2.5 cm) from a wall or other obstructions.
- Keep 4 in (10 cm) of space (minimum) clear above the soundbar. This allows audio to be sent up towards the ceiling for immersive overhead sound.
- If you have less than 4 in (10 cm) of space available above the soundbar, we recommend turning on Simulated Overhead Sound in Settings > Beam Ultra > Height Audio. This will simulate the effect of overhead sound without sending audio towards the ceiling.
- Make sure the touch controls on Beam Ultra are facing up.
Note: Unlike the wall mount for Arc, the wall mount for Beam Ultra does not include magnets for tuning.
Contents
- Beam Ultra Wall Mount bracket
- Positioning guide (don't discard—it may look like packing material)
- 2 knobs
- 4 wall anchors
- 4 #10-12 A screws
Recommended tools
- Pencil or marker for marking screw locations
- Level
- Phillips-head screwdriver or power drill
- Drill with appropriate bit size (see table below)
| Wall material | Pre drill |
|---|---|
Wood stud | 1/8 in / 3 mm bit |
Drywall (no stud) | 5/16 in / 8 mm bit |
Plaster | 5/16 in / 8 mm bit |
Concrete or brick | 5/16 in / 8 mm bit |
Wall mount
Before starting, confirm the arrows on the wall mount are pointing up and the Sonos logo is facing outwards. When mounting, the touch controls on your Beam Ultra should also face up. The vertical line on the mount marks center.
Installation
1 | With a level to confirm accuracy, use the wall mount bracket to mark screw locations. Align the top edge with the bottom of your TV. Position the center line where you want the middle of your Beam Ultra to sit. There should be a minimum of 5.5 in (14 cm) between the top of the wall mount bracket and the TV. Mark the screw locations and remove the wall mount bracket for now. | 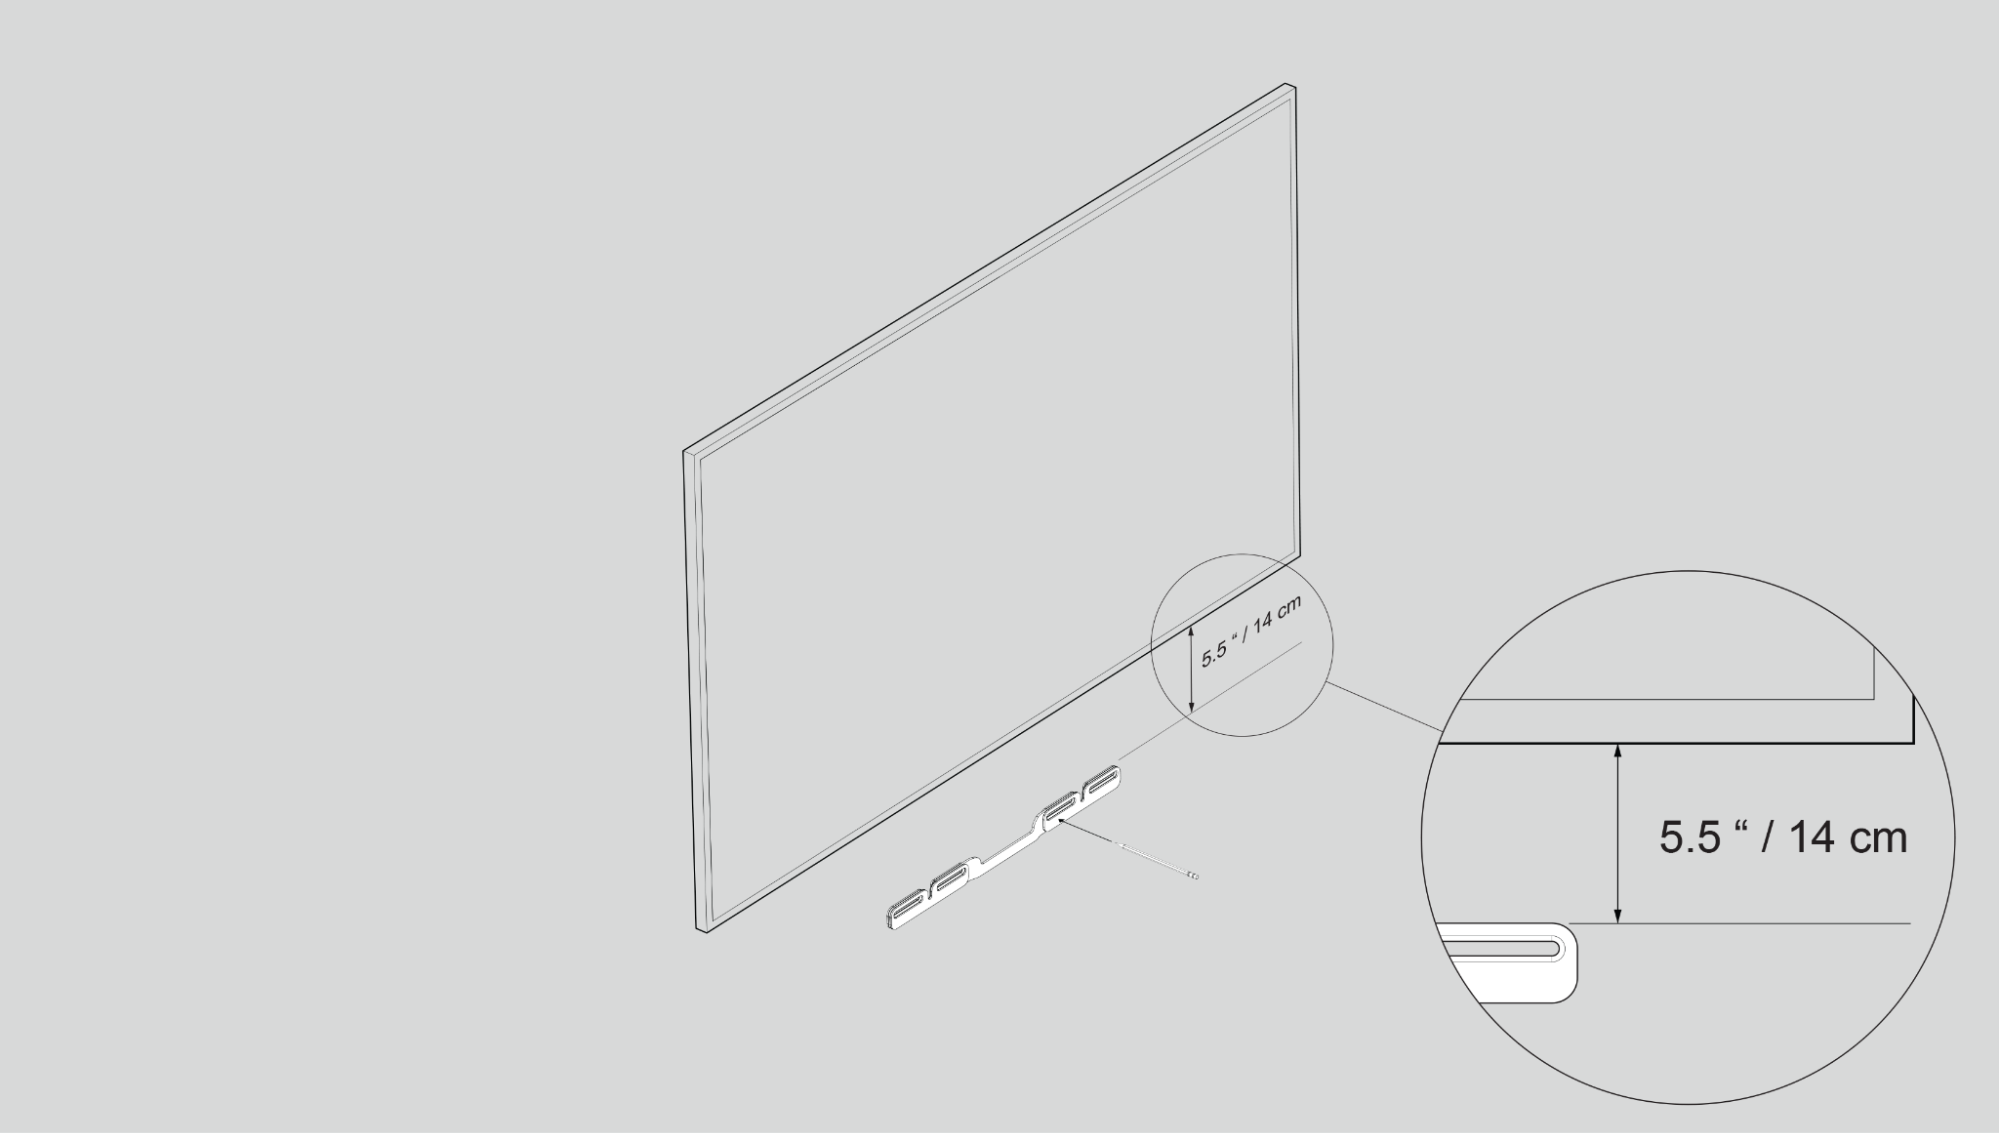 |
2 | If you’re using the included wall anchors, use a 5/16 in / 8 mm drill bit to drill the pilot holes and then insert the wall anchors. Don’t use the anchors if you’re drilling into wood or plastic. | 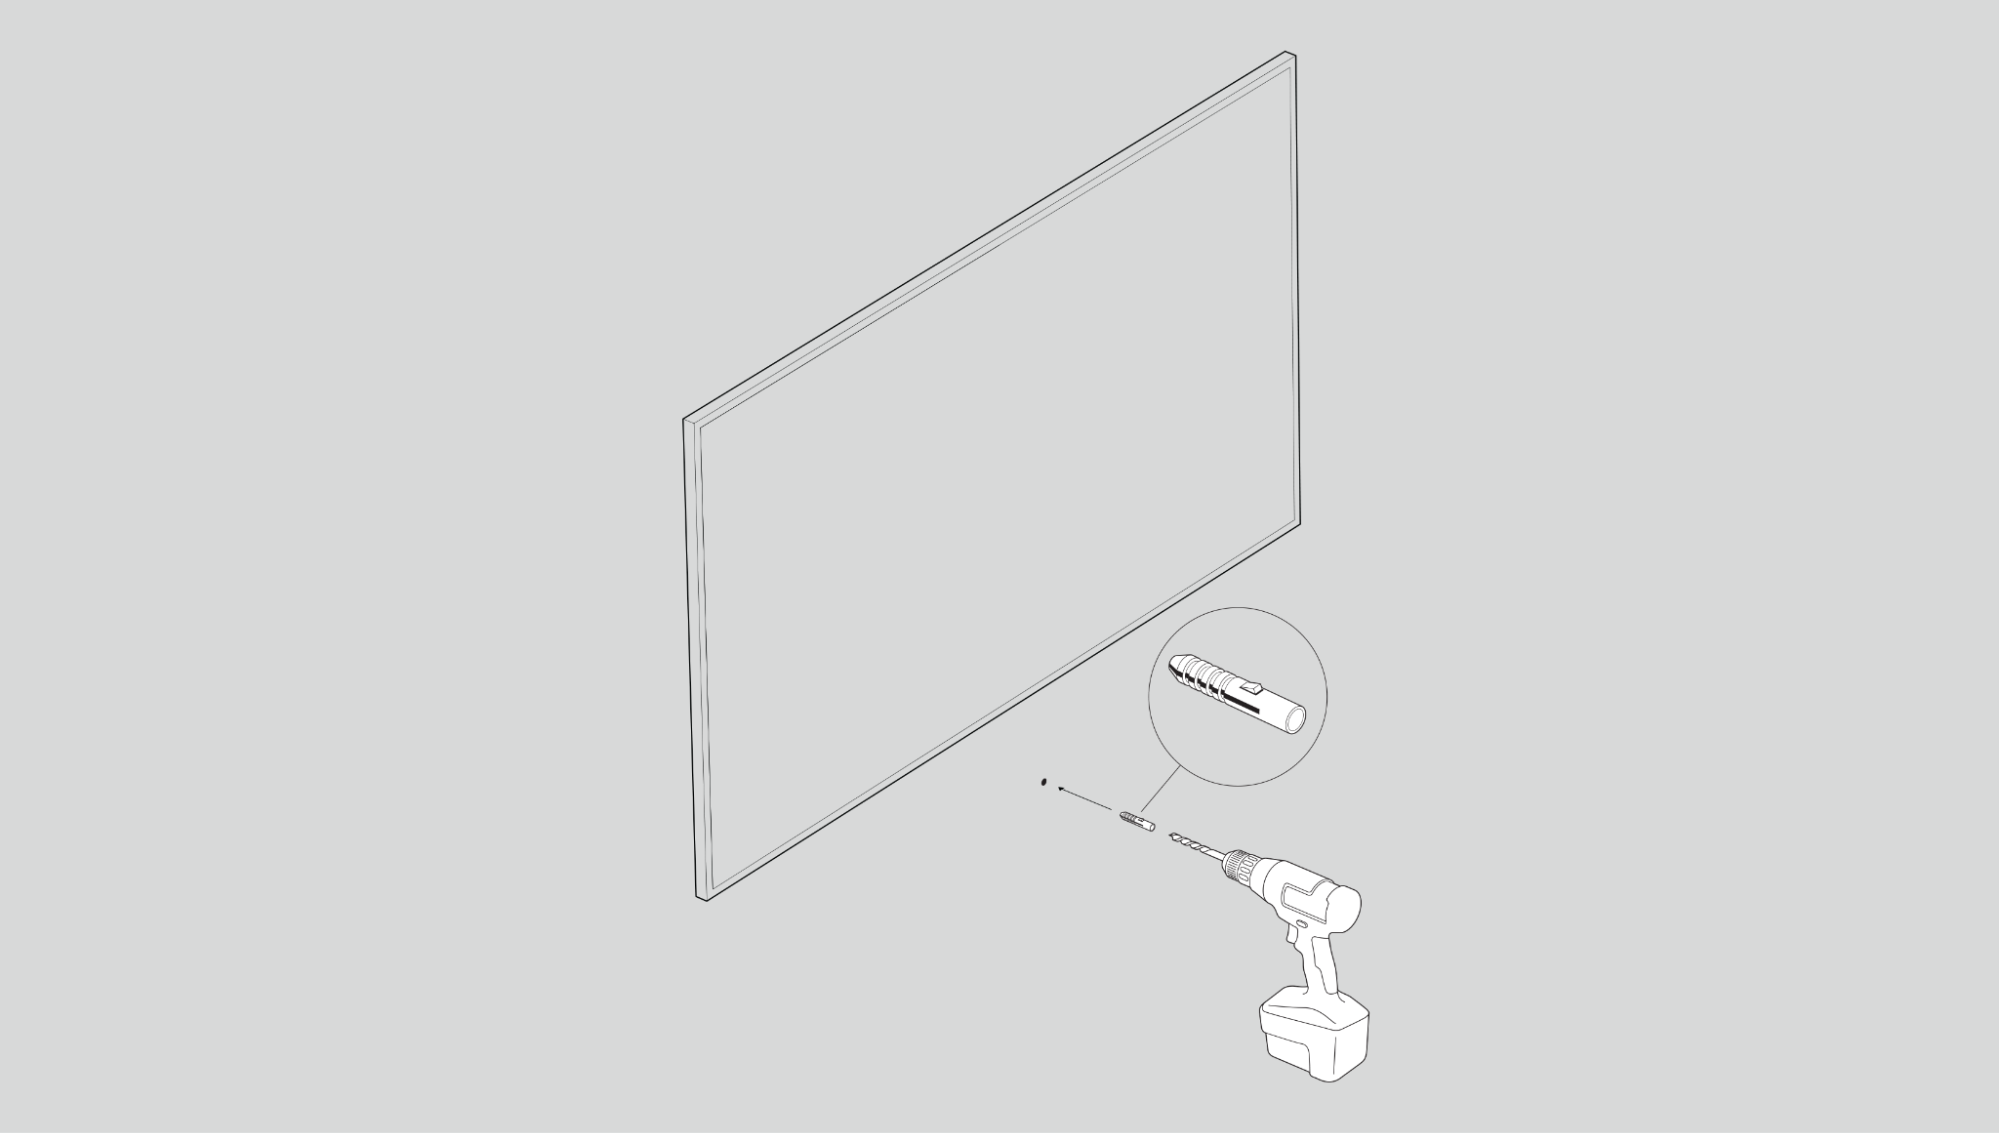 |
3 | Position the wall mount bracket over the marked screw locations. Use a Phillips-head screwdriver or a power drill to screw the bracket to the wall, making sure the arrows in the center are pointing up and the Sonos logo is facing outwards. | 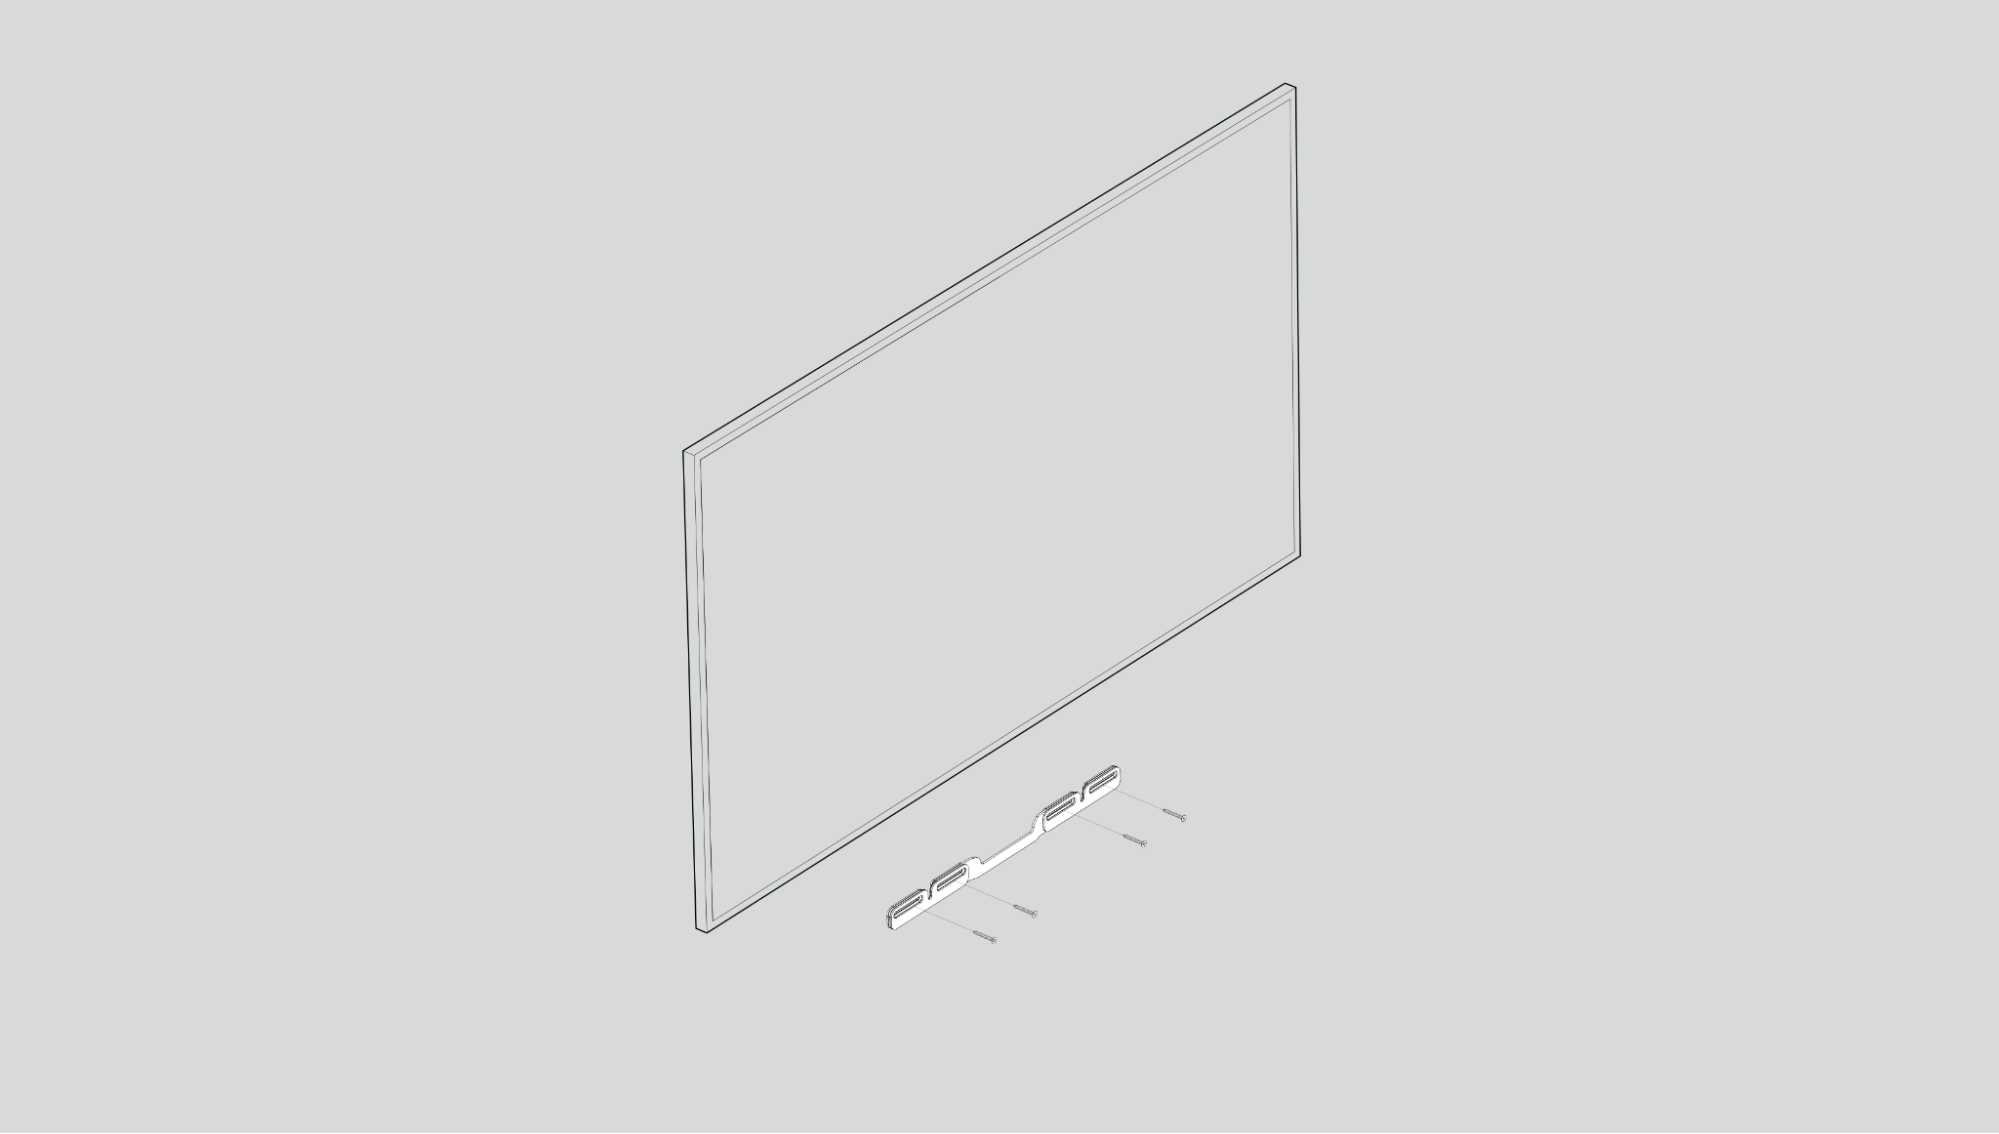 |
4 | Screw the 2 knobs (thumb screws) into the back of the soundbar until they are fully tightened. | 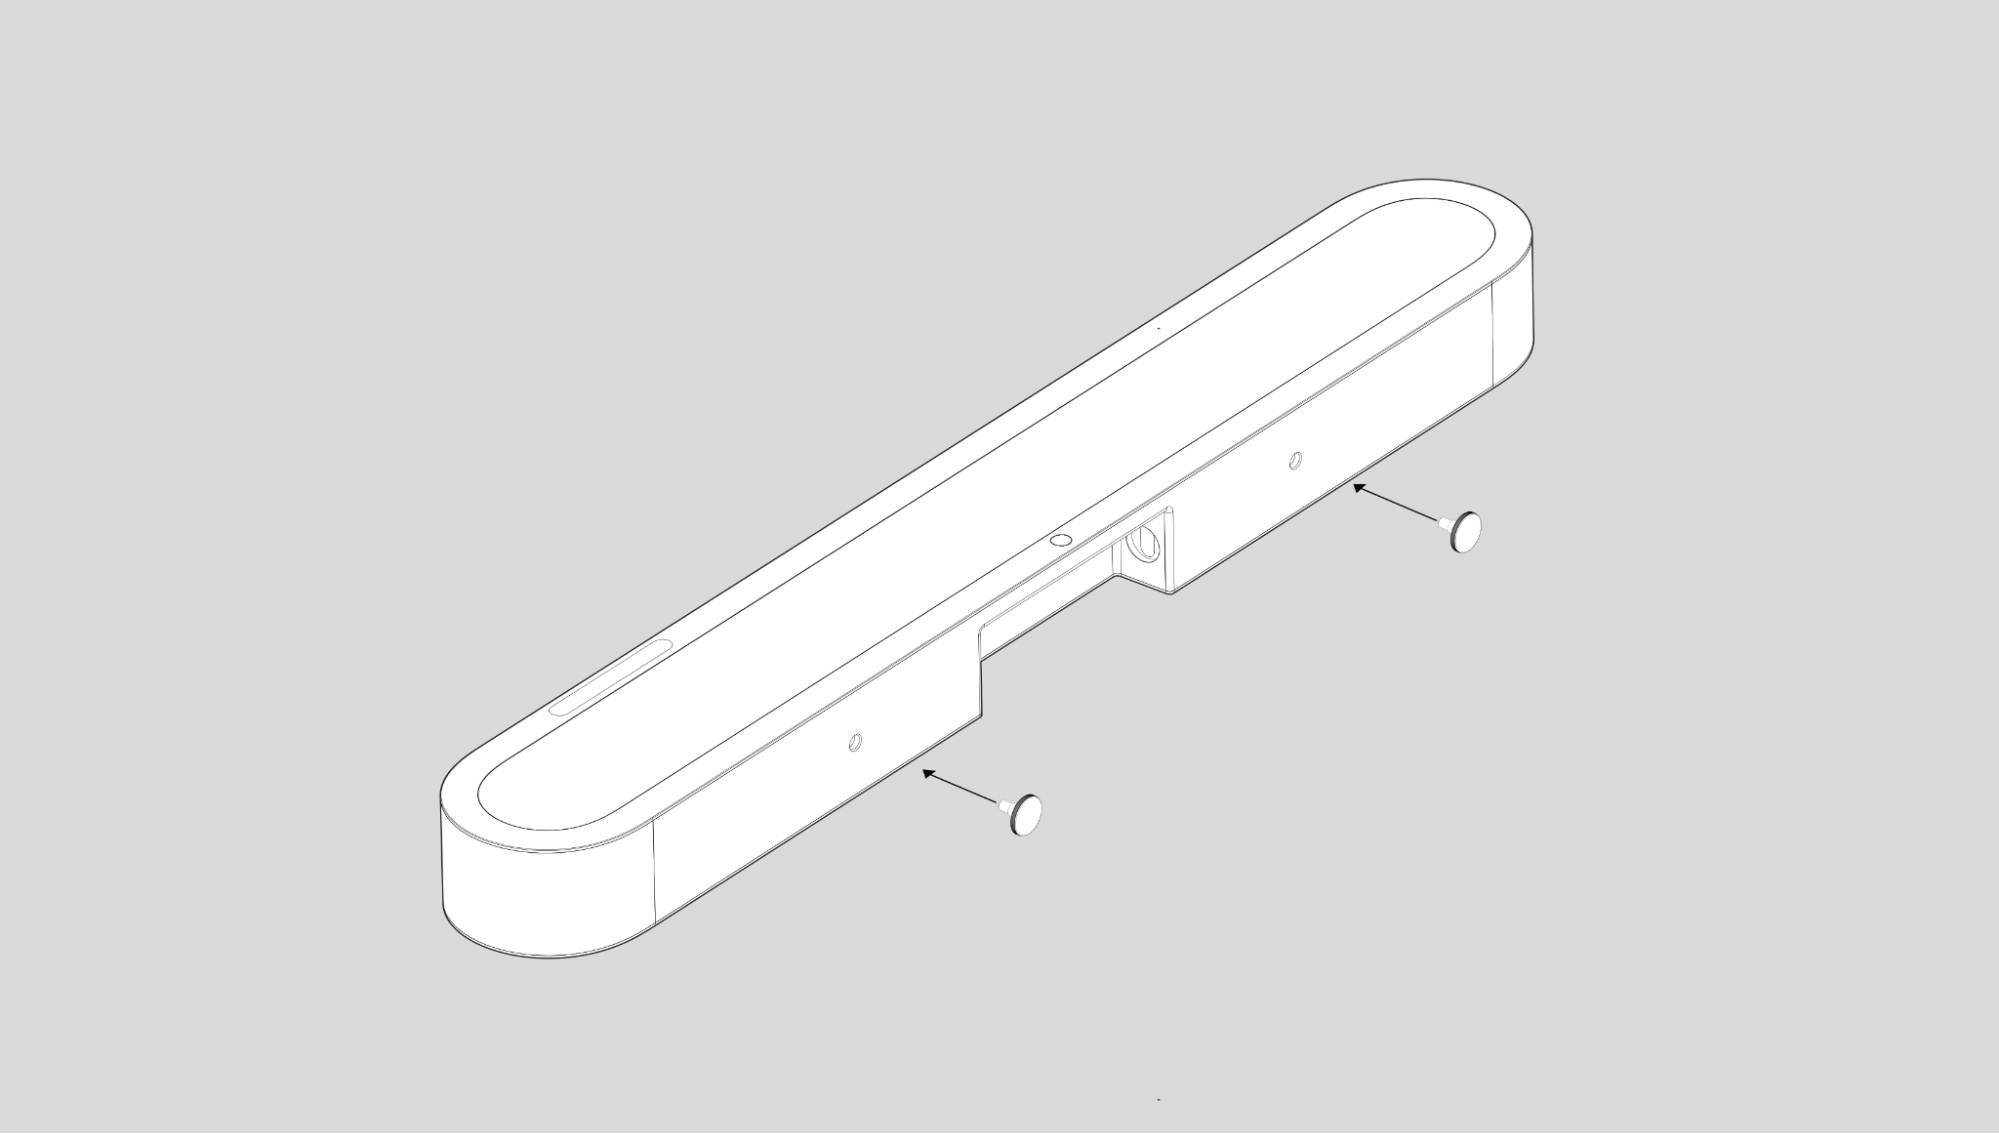 |
5 | Connect the power and HDMI cables to the back of the soundbar. Note: If you’re connecting the cables to the TV at this time, be sure to plug the HDMI cable into the HDMI ARC or eARC port on your TV. | |
6 | Slide the soundbar down so the knobs fit into the slots on the wall bracket. Make sure the touch controls are facing up and the soundbar is fully seated. | 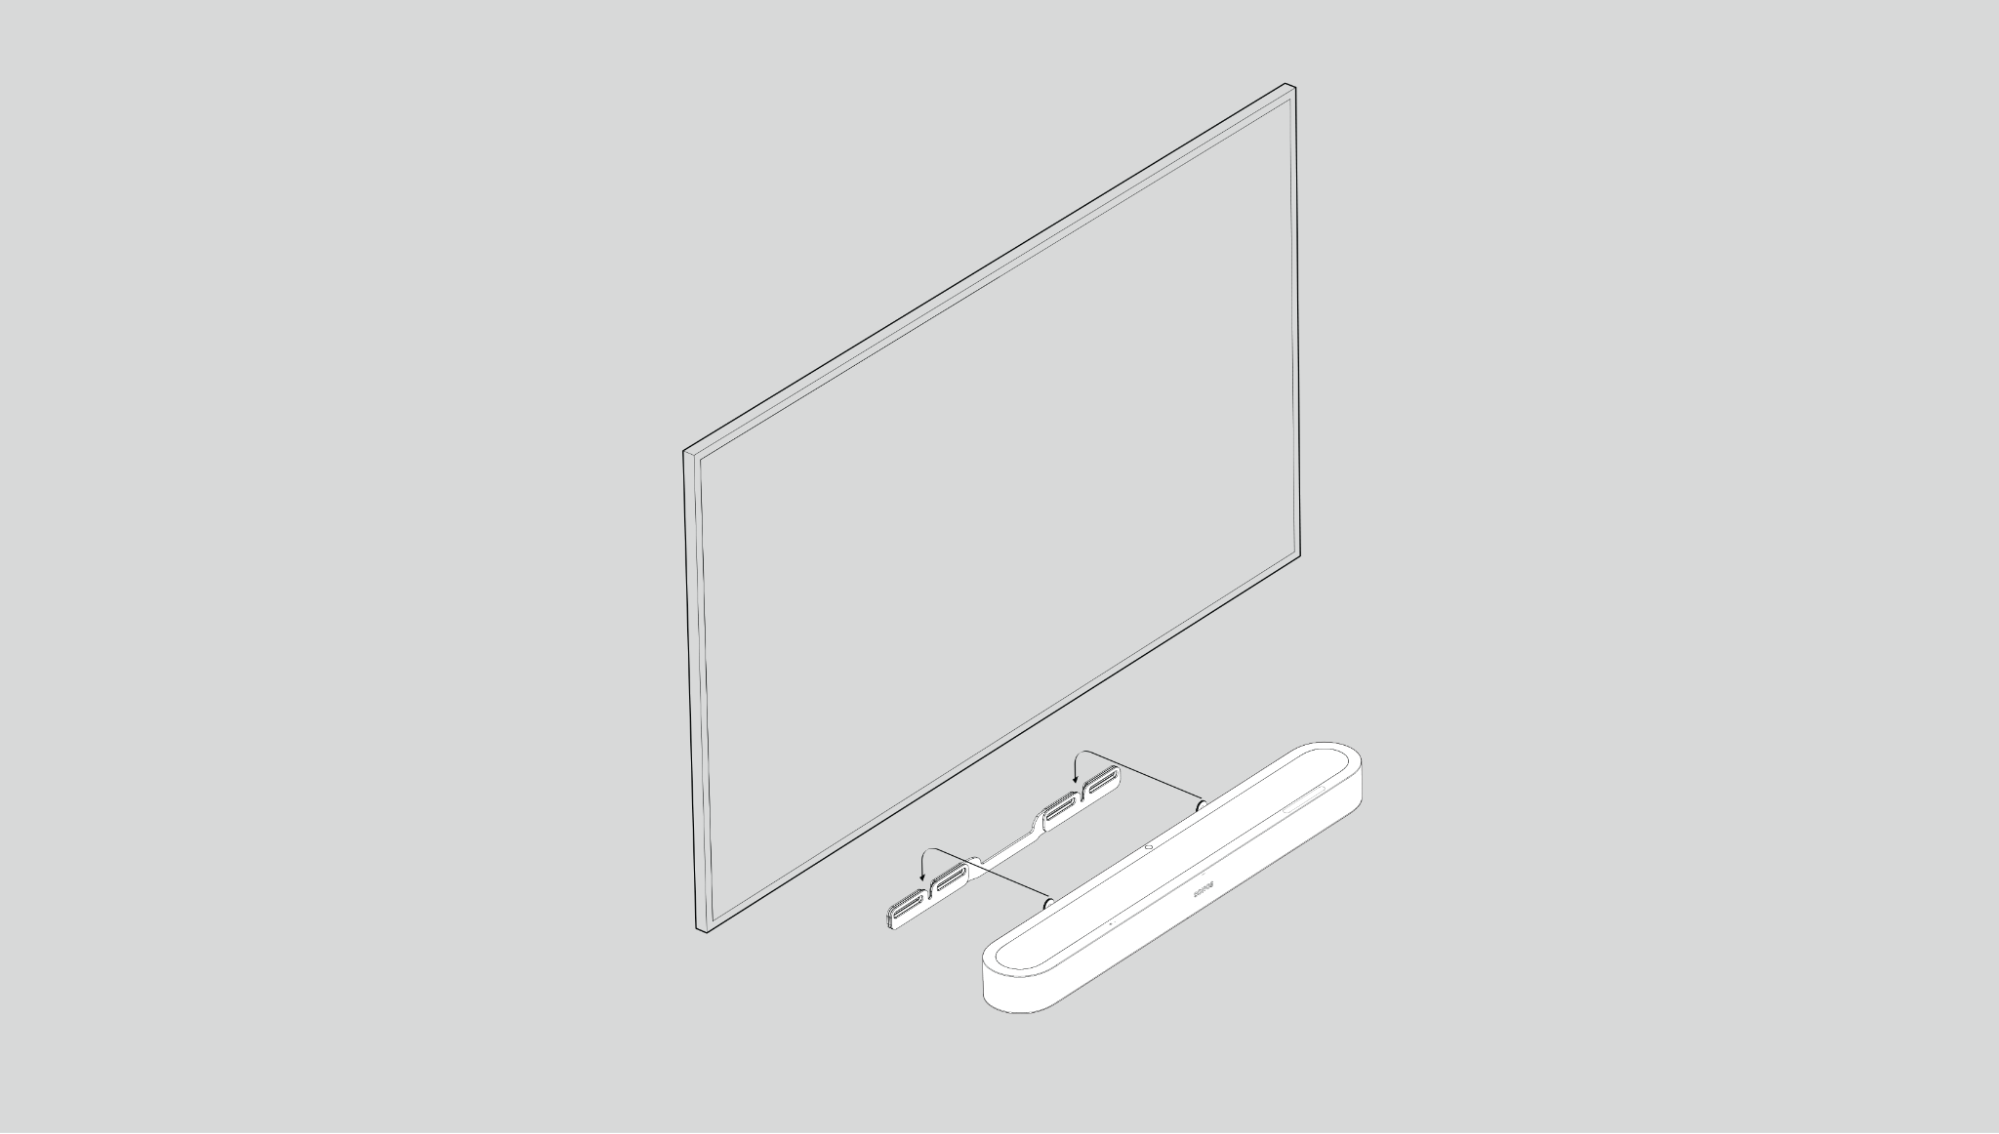 |
Home theater
Start with Beam Ultra and expand your system over time with Sonos speakers that easily connect over WiFi.
Use the Sonos app to configure your home theater and set up helpful features.
- Place your compatible Sonos products around your room.
- Set up your Sonos products in the Sonos app (if you haven't already).
- Go to Settings
 and select your Beam Ultra.
 - Select + Connect Sub or + Set up Surrounds to get started.
Home theater settings
Use the Sonos app to adjust home theater settings:
- Go to Settings .
- Select the room.
- Navigate to Home Theater to get started.
| Setting | Description |
|---|---|
TV Autoplay | If music or other content is playing when you turn on your TV, the audio automatically switches to TV audio (default). |
Ungroup on Autoplay | If your home theater speaker is grouped with other products when you turn on the TV, it automatically drops from the group (default). |
TV Dialogue Sync | If the TV audio is out of sync with the video, you can adjust the audio delay (lip sync) in your room’s settings. |
Group Audio Delay | If you notice audio issues when playing to a group, you can adjust this setting. |
TV Setup | Go through TV configuration again to make adjustments to your setup. |
Use IR | Enable or disable the use of IR remote controls. |
IR Signal Light | Turn on or off to see the IR signal light on your IR receiver when you press a button on your remote. |
Remote Control Setup | During setup, you’ll program a remote control. You can program a different remote control any time. |
Height Audio
Dolby Atmos provides two height audio channels allowing you to expand your sound stage beyond the horizontal plane.
When listening to Dolby Atmos audio through Beam Ultra, Sonos Arc, Arc SL, Arc Ultra, Beam (Gen 2), or Era 300, you can adjust the level of the height audio channels by following the steps below:
- Open the Sonos app.
- Go to Settings.
- Select the room with your Atmos-capable home theater product.
- Select Height Audio.
- Use the slider to increase or decrease the volume of the height audio channels.
Overhead Sound Mode
Overhead Sound Mode optimizes overhead sound effects based on whether the space above the speaker is clear or obstructed (such as being tucked in a television console).
Simulated
Use this feature if you have less than 4 inches of space above your soundbar. Overhead sound will be simulated rather than played through the top of the speaker.
Trueplay™
Trueplay tuning measures how sound reflects off walls, furnishings, and other surfaces in a room, then fine tunes your Sonos speaker to make sure it sounds great no matter where you place it.
During setup, choose the Trueplay option that works best for you and your space.
If you would like to retune late, follow these steps:
- Go to Settings .
- Choose the product you would like to tune.
- Select Trueplay.
Advanced tuning
Advanced tuning is custom and precise. It takes about 5 minutes and uses the microphone on an iOS device (running iOS 8 or later) so you'll move around the room while the sound is fine tuned for your space.
Note: Advanced tuning is the best choice for large rooms (open concept spaces may experience less precise tuning).
Microphone and voice
There are two ways to control the microphones on Beam Ultra:
A universal microphone switch on the back turns all microphones on and off.
A voice services button on top turns voice services on and off without affecting the microphones needed for Trueplay™and other microphone-enabled features.
- When both are on, voice control and all microphone-enabled features are available.
- When both are off, voice control and all microphone-enabled features are unavailable.
- When the universal microphone switch is on and the voice services light is off, Trueplay™ and other microphone-enabled features are available but voice control is off.
Voice control
You can add Sonos Voice Control, or a voice assistant you use often, for hands-free control of your Sonos system.
Note: If you're adding a voice assistant, download the voice assistant's app before adding it to your Sonos system.
To add voice control in the Sonos app:
- Go to Settings .
- Select General Settings.
- Select Voice Assistants, and then choose + Add a voice assistant to get started.
| Service | Description |
|---|---|
Sonos Voice Control | Play music and control your system with hands-free ease. It all starts with “Hey Sonos." Here's a few things you can do hands-free with Sonos Voice Control:
|
Product settings
Use the Sonos app to adjust product settings for your Beam Ultra:
- Go to Settings.
- Select the room.
- Select Beam Ultra under Products to get started.
| Setting | Description |
|---|---|
Status | |
Microphone | Indicates if the microphone switch is on or off. |
Network | See WiFi connection status and other network information. |
Connection | |
Disable WiFi / Enable WiFi | Toggle WiFi on and off. Note: An Ethernet cable, wired to your router, is required to allow WiFi to be disabled. |
TV Audio Swap
Instantly swap TV audio from a Beam Ultra to Sonos Ace Ultra and Sonos Ace, and feel enveloped in exhilarating surround sound and spatial audio.
Note: Only TV audio (via HDMI or optical) can stream to Sonos Ace.
Use the Sonos app to set up the connection between your Beam Ultra, Sonos Ace Ultra or Sonos Ace. Make sure your products are up to date and WiFi is enabled.
Specifications
Audio | |
Amplifiers | Nine Class-D digital amplifiers tuned to the soundbar's unique acoustic architecture. |
Tweeters | Five tweeters ensure faithful playback of high and mid-range frequencies. The forward-firing mid tweeter provides a smooth center image while two side-firing horn-loaded mid tweeters create stereo separation. Loaded into a directional horn, the two upward-firing tweeters reflect sound off the ceiling when playing Dolby Atmos content. |
Woofers | Four low profile woofers deliver exceptional bass in a compact design |
Microphones | The far-field microphone array uses advanced beamforming and multichannel echo cancellation for quick and accurate voice control and Trueplay tuning. When used with Move 2 and Play, the microphones enable portable surrounds. Disconnect by toggling off the mic switch. |
Adjustable EQ | Use the Sonos app to adjust bass, treble, and loudness. |
AI Speech Enhancement | AI detects the human voice to make every word crystal-clear. With just a tap in the Sonos app, choose between four customizable levels for optimal audibility. |
TrueplayTM | This software measures the acoustics of the room then fine-tunes the EQ. Compatible with iOS and Android devices. |
Night Sound | Turn this setting on in the Sonos app to reduce the intensity of loud sounds and enhance quieter sounds. |
Home Theater Audio Formats | Dolby Atmos*, Dolby Atmos (Dolby Digital Plus), Stereo PCM, Dolby Digital, Dolby Digital Plus, Dolby TrueHD*, Dolby Atmos (True HD)*, Multichannel PCM*, Dolby Multichannel PCM*, DTS Digital Surround** The Sonos app's Now Playing screen will display what type of audio is being decoded. *HDMI eARC connection required. **This is not an indication of a licensed decoder. |
Dolby Atmos Music1 | With dedicated upfiring drivers, Beam Ultra delivers Dolby Atmos music in true spatial audio, creating an immersive listening experience. |
TV Audio Swap | Swap TV audio between the soundbar and Sonos headphones. |
Simulated Overhead Sound | Optimizes overhead sound effects based on whether the space above the speaker is clear or obstructed. Selectable by the user in the app during the setup process. |
Details & Dimensions | |
Dimensions (H x W x D) | 2.48 x 29.53 x 4.1in (63 x 750 x 105 mm) |
Weight | 6.35 lb (2.88 kg) |
Colors | Black, White |
Finish | Matte |
Mounting | M5 x 0.8mm thread pitch L6.5mm |
Controls | Use the capacitive touch controls to play, pause, skip, replay, adjust the volume, turn off voice assistants, and group or ungroup Sonos products. |
Bluetooth button | Press to pair a Bluetooth device. |
Mic switch | Toggle off this switch on the back of the product to disconnect power to the mics. |
LEDs | Lights on the product indicate connection, microphone activity, and mute status. |
Power & Connectivity | |
WiFi | Using Sonos S2: Compatible with WiFi 6. Connect to WiFi with any 802.11a/b/g/n/ac/ax 2.4 GHz/5 GHz broadcast-capable router. Wi-Fi Activation/Deactivation: Wi-Fi can be disabled by using the Sonos app. Go to Settings:
|
HDMI ARC/eARC | Connect to your TV's HDMI eARC/ARC port with the included HDMI cable. Optical adapter sold separately. |
Bluetooth | Bluetooth 5.3 supports audio streaming from any Bluetooth enabled device. Bluetooth Activation/Deactivation: Bluetooth can be turned Activated/Deactivated using the Bluetooth button located on top of the product: Press Bluetooth button to activate / deactivate connection. |
Voltage | 100-240V 50/60Hz internal power supply |
Voice | Works with Sonos Voice Control. |
Apple AirPlay 2 | Works with AirPlay 2 on Apple devices iOS 11.4 and higher. |
What's in the box? | |
Beam Ultra | Product |
Power cable | Length: 6 ft (2 m) |
HDMI cable | Length: 4.9 ft (1.5 m) |
Documentation | Set Up Guide and legal/warranty information |
Requirements | |
WiFi | Internet connection |
Power source | Nearby electrical outlet. |
Sonos app | The latest generation of the Sonos app running on a compatible device. |
1 Dolby, Dolby Atmos, and the double-D symbol are registered trademarks of Dolby Laboratories Licensing Corporation. Manufactured under license from Dolby Laboratories. Confidential unpublished works. Copyright © 2012-2024 Dolby Laboratories. All rights reserved.
Important safety information
- Read these instructions. Keep these instructions. Heed all warnings. Follow all instructions.
- Clean only with dry soft cloth. Household cleaners or solvents can damage the finish on your Sonos components.
- Do not block any ventilation openings. Install in accordance with the manufacturer’s instructions.
- Do not install near any heat sources such as radiators, heat registers, stoves, or other apparatus that produce heat.
- Protect all cables from being walked on or pinched, particularly at plugs, convenience receptacles, and the point where they exit from the apparatus.
- Only use attachments/accessories specified by the manufacturer.
- Unplug this apparatus during lightning storms or when unused for long periods of time.
- Refer all servicing to Sonos qualified service personnel. Servicing is required when the apparatus has been damaged in any way, such as power-supply cable or plug is damaged, liquid has been spilled or objects have fallen into the apparatus, the apparatus has been exposed to rain or moisture, does not operate normally, or has been dropped.
- Warning: Unless otherwise specified, this unit is not waterproof. To reduce the risk of fire or electric shock, do not use this product near water or expose this product to liquid, rain, moisture or other wet conditions. Do not place objects filled with liquids, such as vases, on the product.
- The Mains plug should be readily available to disconnect the equipment.